How to install the 1on1 Secure – AI Security, Anti-Spam, and Firewall Plugin in WordPress
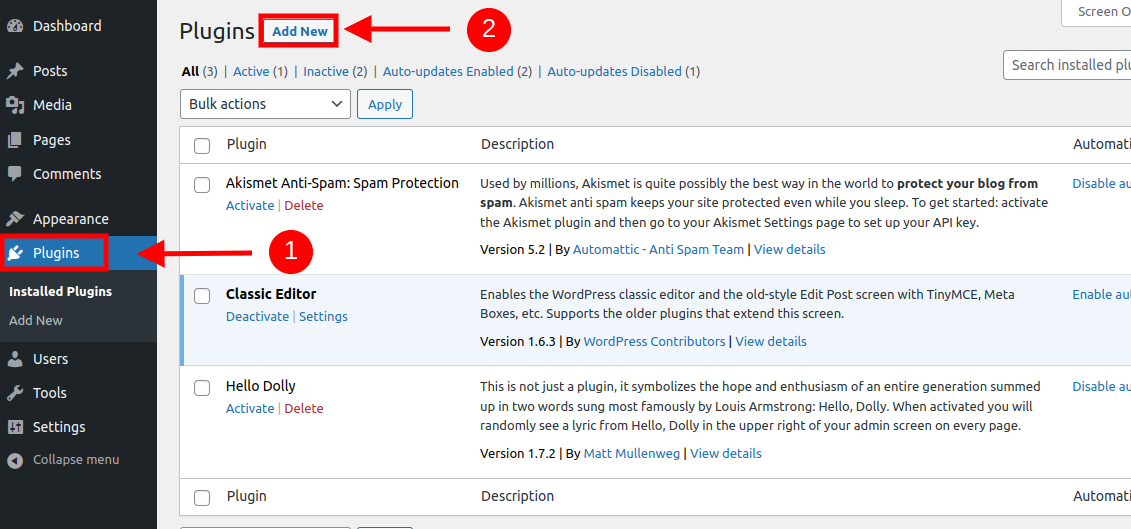
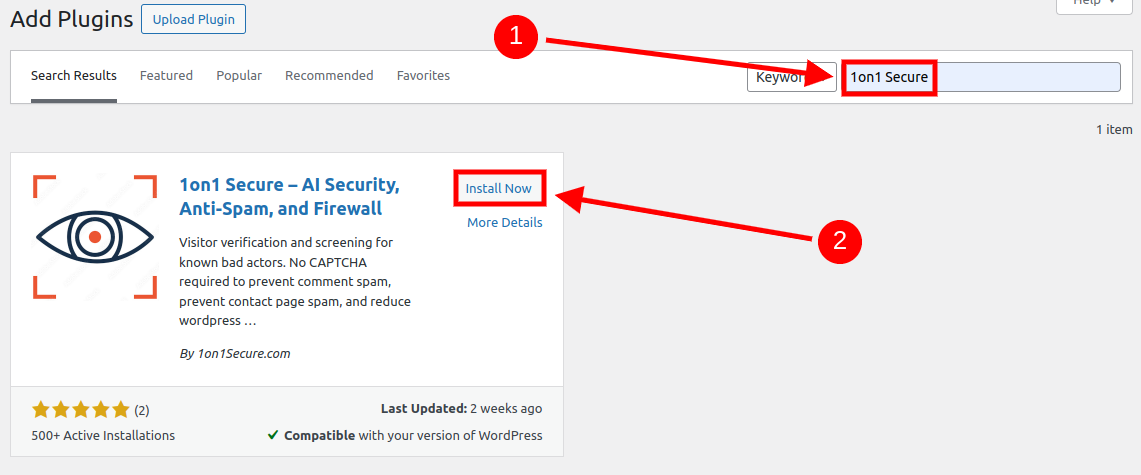
2. Find the "1on1 Secure – AI Security, Anti-Spam, and Firewall" plugin by typing the keyword "1on1 Secure" (1). Press the "Install Now" button near the plugin's name (2).
OR
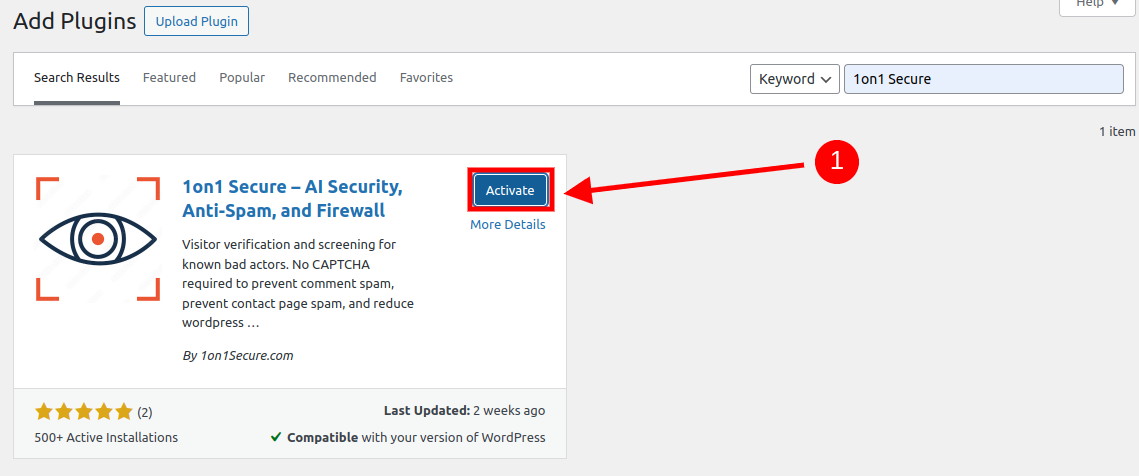
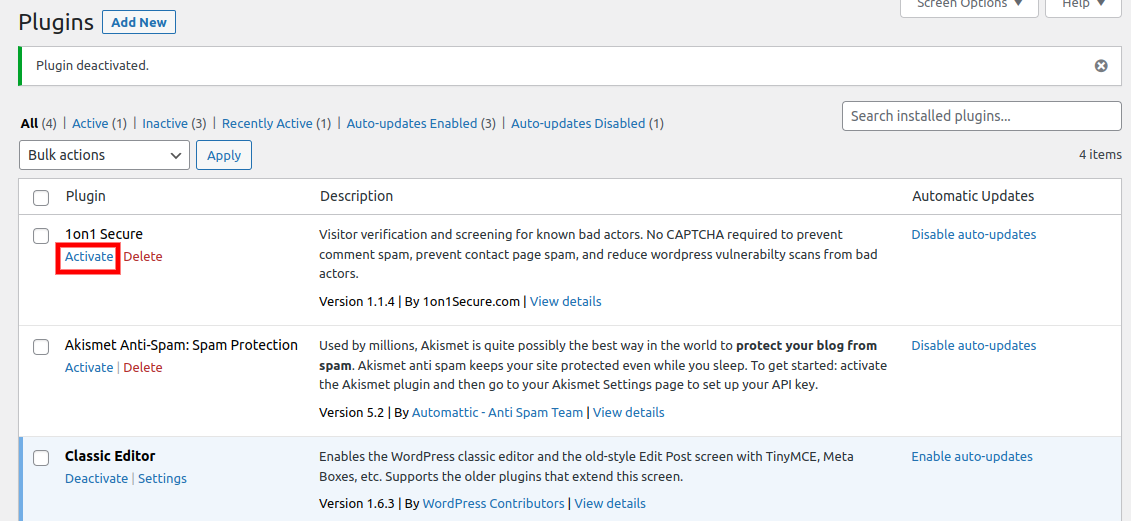
In the "Plugins" section, find the installed plugin "1on1 Secure – AI Security, Anti-Spam, and Firewall" and click the string "Activate" under its name.
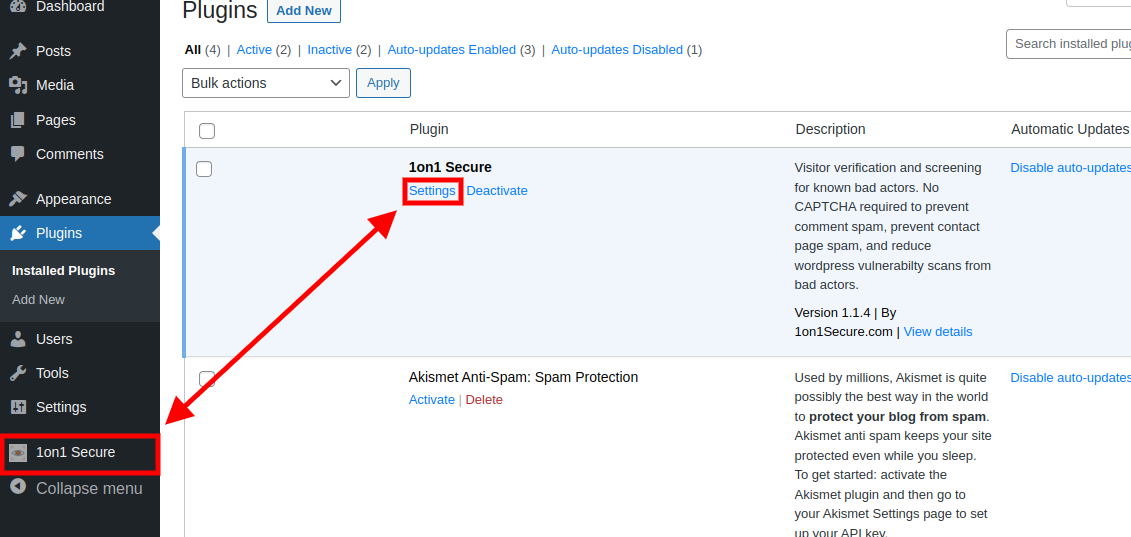
4. After the process of activation, you can either just click the string "Settings" under its name. OR click the "1on1 Secure" menu on the left panel to go to the 1on1 Secure settings page.
5. Now, click on the blue ''Get API Key'' button (1).

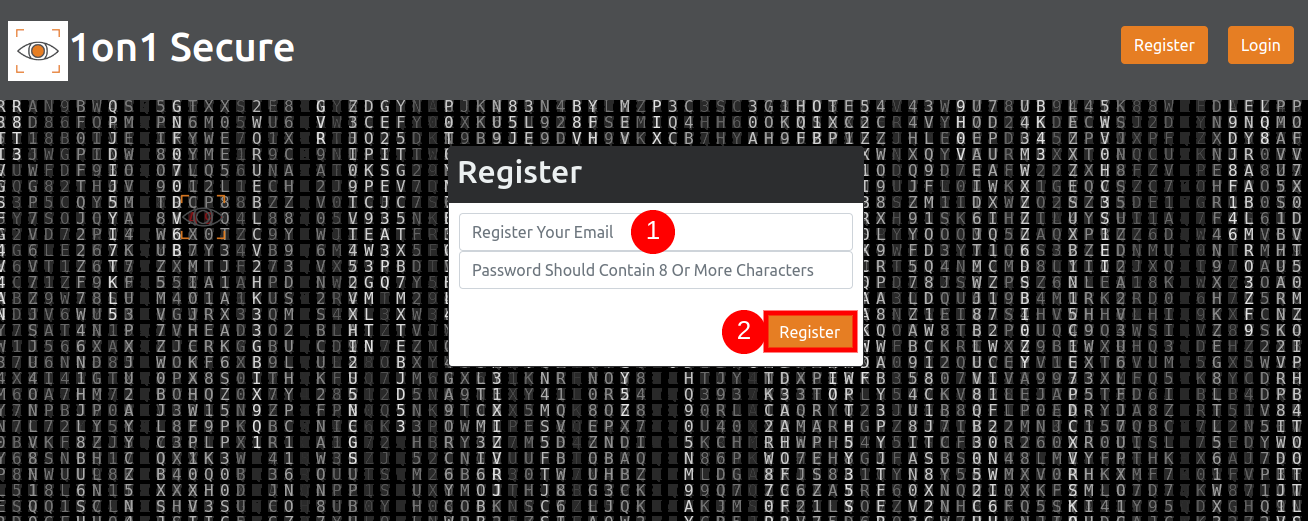
6. The browser will open the 1on1 Secure console on a new tab. Here, you can register a new account with your email address (1) then click the ''Register'' (2)
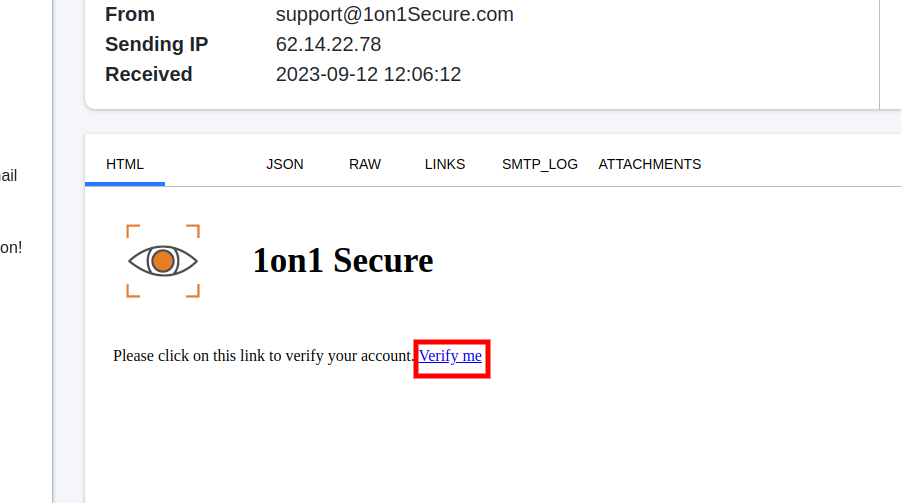
7. When you're done, you will see a page just like the first image below. Please check your email inbox and click on the link to verify your account.

8. The system will redirect your back to the 1on1 Secure console and show you your API key on top of the screen. You can either just copy the key from here and add to the plugin settings page.

OR
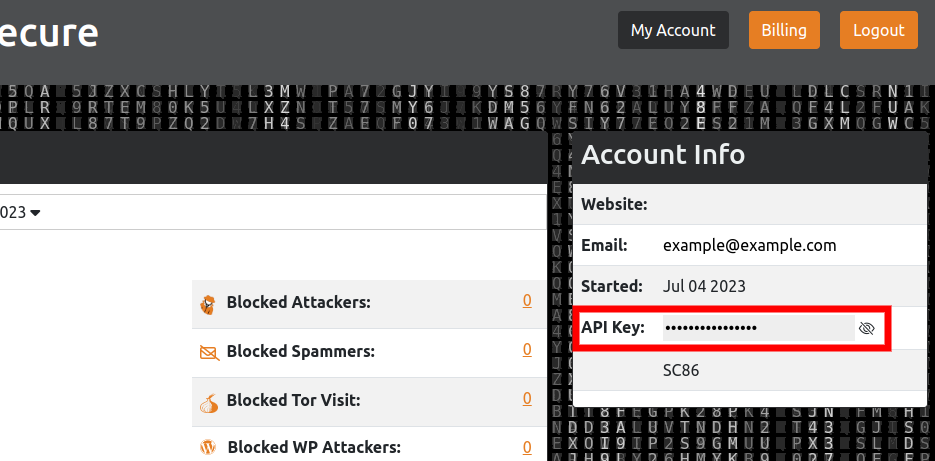
you can click on the "My Account" button at the bottom of the page. And click on the gray box to copy the key from the main dashboard.
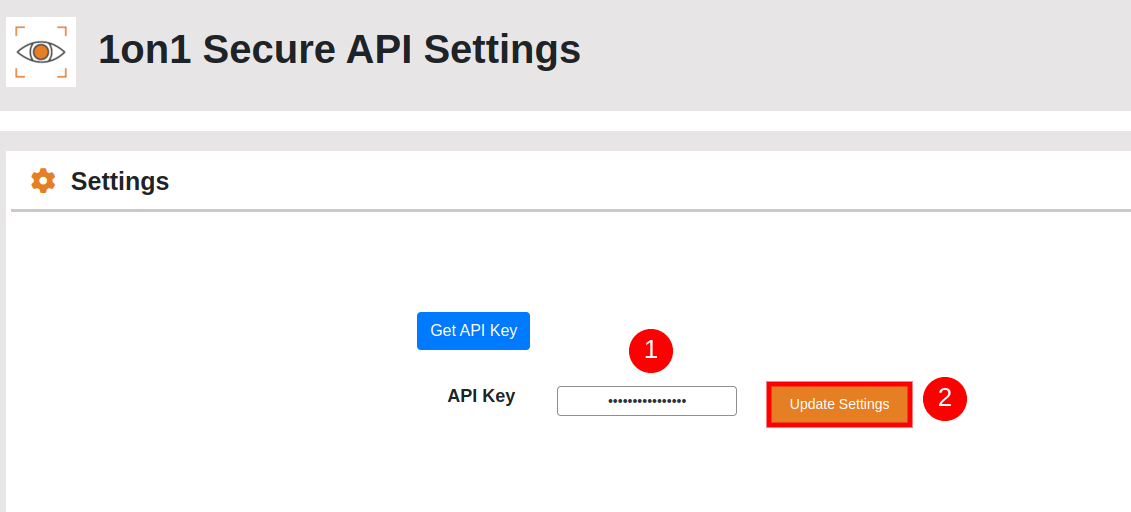
9. Enter your API Key on Wordpress plugin settings page (1) and you can click the "Update Settings" button to save (2).
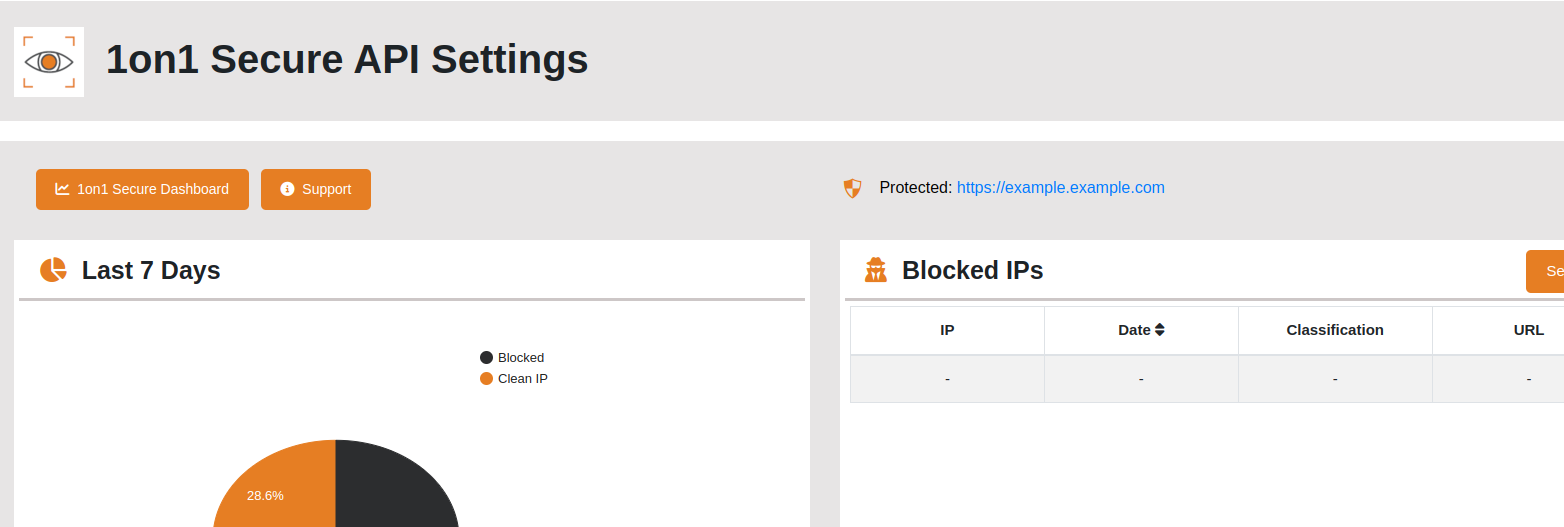
10. The settings page will reload and show you more data and graphs about your site's protection. On your 1on1 Secure console, the name of your website will also appear there to indicate that the set up is successful